background 1.20

Showing posts with label nursery. Show all posts

Wednesday, March 30, 2011

Sweet and Simple Wall Mural

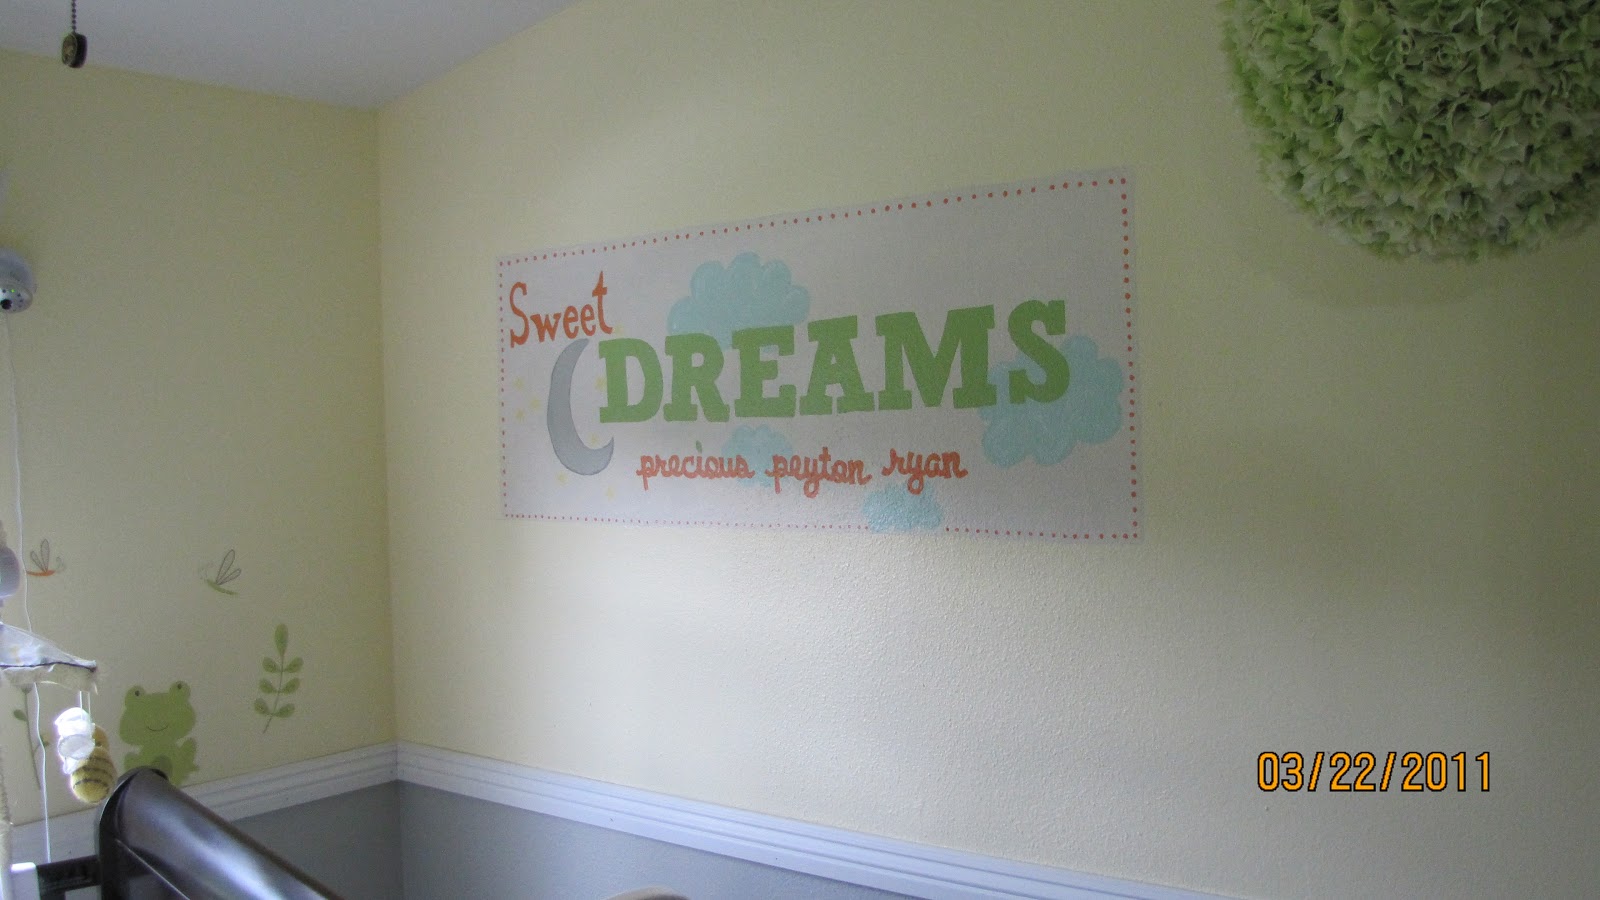
Last week I spent a couple evenings out at Matt's sister and brother in laws' home, helping with the finishing touch of their daughter's nursery.  Sarah had asked me to paint a little something above Peyton's crib.

To tell the whole story, we have to go back to October--even before Peyton was born--to her baby shower.  I hosted a shower for Sarah and Peyton at our home.  The theme was "Sweet Dreams" complete with beds for tables, bedtime stories in lieu of cards and a midnight snack dessert table:


And in true Hannah fashion {I was my cheerleading squad's designated sign maker}, I made a butcher-paper sign with watercolors that said: "Sweet Dreams, Precious Peyton Ryan."  You can sort of see it below; although my chandelier {isn't it fabulous, by the way?} is hiding it:


I figured I would just throw the paper sign away at the end of the night, but Sarah took it home and hung it above Peyton's crib, where it stayed until last week.  After four months of looking at the paper sign, Sarah was ready for something more permanent.   However, she liked the look of it, so we decided to keep the words as it but make it look a little more sharp.

I'm posting this because #1 - I thought it turned out pretty nice #2 - I like reading about how other people do crafty things on their blogs and #3 - I don't have any recent pictures of Liam to post tonight :)

Nursery Mural Tutorial:

1. The first thing I did was mock up what I wanted it to look like in Word, including picking some cute fonts: "A Font With Serifs", "Sketch Block Bold" and "Clementine Sketch"-- all available for free download at dafont.com  Then I printed out the letters.  I cut them out individually and traced them to the wall. 


2. For the word "Sweet," I turned the page over and traced the letters in charcoal. 


3. Then I placed it on the wall where I wanted it and pressed firmly {I used the eraser end of a pencil} on the letters to transfer the charcoal to the wall.  I traced around the charcoal with pencil, then wiped the charcoal off.


4. After all of the letters were traced out, I began painting.


5. And painted, and painted and painted.  I added a moon, stars, clouds and a dot border.


6. Voila!


Thursday, April 1, 2010

DIY Nursery

For those of you who know me, this may come as a surprise: I have been having such a difficult time being decisive about this baby. I haven't nailed down a name (Matt and I are constantly updating our "short list") and up until the "Nursery D-Day," I had changed my mind about ten times regarding the theme/decor/colors of Baby K's room. I'm sure it irritated Matt, who wanted to start planning his role in the reno; but it irritated me even more. I felt so much pressure to have the perfect room, that making a decision was overwhelming. There were a couple screens that it needed to fit into: 1) I wanted it to be transitional to a girl room, so we don't have to wipe the slate clean the next go-'round 2) It had to be a little fun and whimsical 3) I wanted it to flow with the remainder of our home.

So, with some help--the room is now in a state of "almost there." The paint is on the wall, the big pieces are in, and I am very so very happy with the results.

My little sis, Katie, and her boyfriend, Stephen, sacrificed their weekend to come up from Los Angeles and assist. And we couldn't have done it without them. They flew in on Friday night and we went out for dinner, but the place we chose was having a Mariachi concert. Have you ever tried to carry on a conversation at the same time as a mariachi band is playing??? Between the mariachis and the "ay-yay-yay-yay-yay's" coming from the audience, we couldn't really carry on much of a fluid conversation.

By the time we got home, Katie had started plotting the POA (my term for "plan of action") and our to-do list. I may have caught her a little off-guard, when I told her that I still had NO IDEA what I wanted to do in the room. In an act of sibling reversal, Katie took on my usual--planner/bossy/know it all role, and whipped me into gear. By midnight we had a shopping list, layout and color scheme.

So below is the start to finish timeline of the nursery thus far. I will post final pics once all the decor and finishing touches are in place. We started off with a blank slate: beige walls and white carpet.


Matt and Stephen honed in on their precision skills with the molding. We decided to lift the molding higher than a traditional chair rail heigth. And above the molding, the wall is painted a soft creme which ties in with the creme bedding.


Katie, our family's resident artist, created a free-hand mural that filled my screen for fun and whimsical. We decided to add a monkey--no it is not a jungle theme, so please refrain from purchasing any jungle stuffed animals--to contribute to the fun element of the room.


The furniture is a Kratz creation. At a local boutique, I fell in love with a antiqued French crib and dresser; but the set had a boutique level price tag attached and Matt and I decided that we could replicate the look and save the $3,500 for Baby K's college. We bought the white birch branch at Smith and Hawken before it went out of business. Along with the mural, it is my favorite part of the room. I think that the room has a great juxtaposition between luxurious and earthy elements.


In one day, we accomplished so much. I couldn't believe that we had knocked so much out in about 8 hours. Needless to say someone deserved a nap....